Using OAuth framework to authorize access to data
Corrigo Enterprise REST API uses OAuth 2.0 authorization framework to obtain a bearer token to authorize API requests. Every call to this API must specify the Authorization HTTP header that includes the bearer token retrieved from the Corrigo OAuth server. This token expires every 20 minutes, which necessitates the constant refresh of this token as described in the section below.
An example of this header his shown below.
Authorization: bearer pyeLrTJ99eJwBkDzLWzSksaAncLRCneyaW2P9FmhGRQSVlWB60jRqiGSN5ERqyqrRq_cE_zPW0DQAj15s_uctczFpPrFSqfwSIPDhBdhyJyQe_FSWNMASC2fL2EvTyPvFduJrbkhtcCnp_QrlH10KsJGwbe7uyhWIjkl-zhANI8YlLUEJGpZMd0Kq3V1roeqkYyHN7wSNNuElXd3VDyPAe2ivcb6ijVSFPmNmo9fG8-re4wpUV_pqMXmZJ2iqGJJ4TEY2_NL_Vf0Z7sYIAZgvOvDQqw-x0AmyLkje34cMLz88zK8
How to access a Sandbox CompanyDirect licensees of Corrigo Enterprise have one or more non-Live Companies referred to as Stage or Preview. Any non-Live Company can be used as a Sandbox, once configured by the Corrigo System Administrator. The System Administrator can provide API credentials to any authorized internal or external development teams.
For Technology Partners seeking to develop reusable solutions, a Partner sandbox can be provided pursuant to enrollment in the JLLT Integration Marketplace, which is planned for launch in April 2022.
Step 1 - Create Service User
First step is to create a create a special user account that will be used by the consumer to access Corrigo Enterprise. A standard Corrigo Enterprise role named WSDK which stands for Web Services Development Kit is normally used with this user account. However, any role may be used as long as that role includes Permissions - Web Services Access.
Step 2- Generate API Credentials
Once the user account is defined, it shall be linked to global settings which allow you to generate API credentials using the specified user account for system access. This step requires System Administrator role-level access to your Corrigo Enterprise Sandbox.
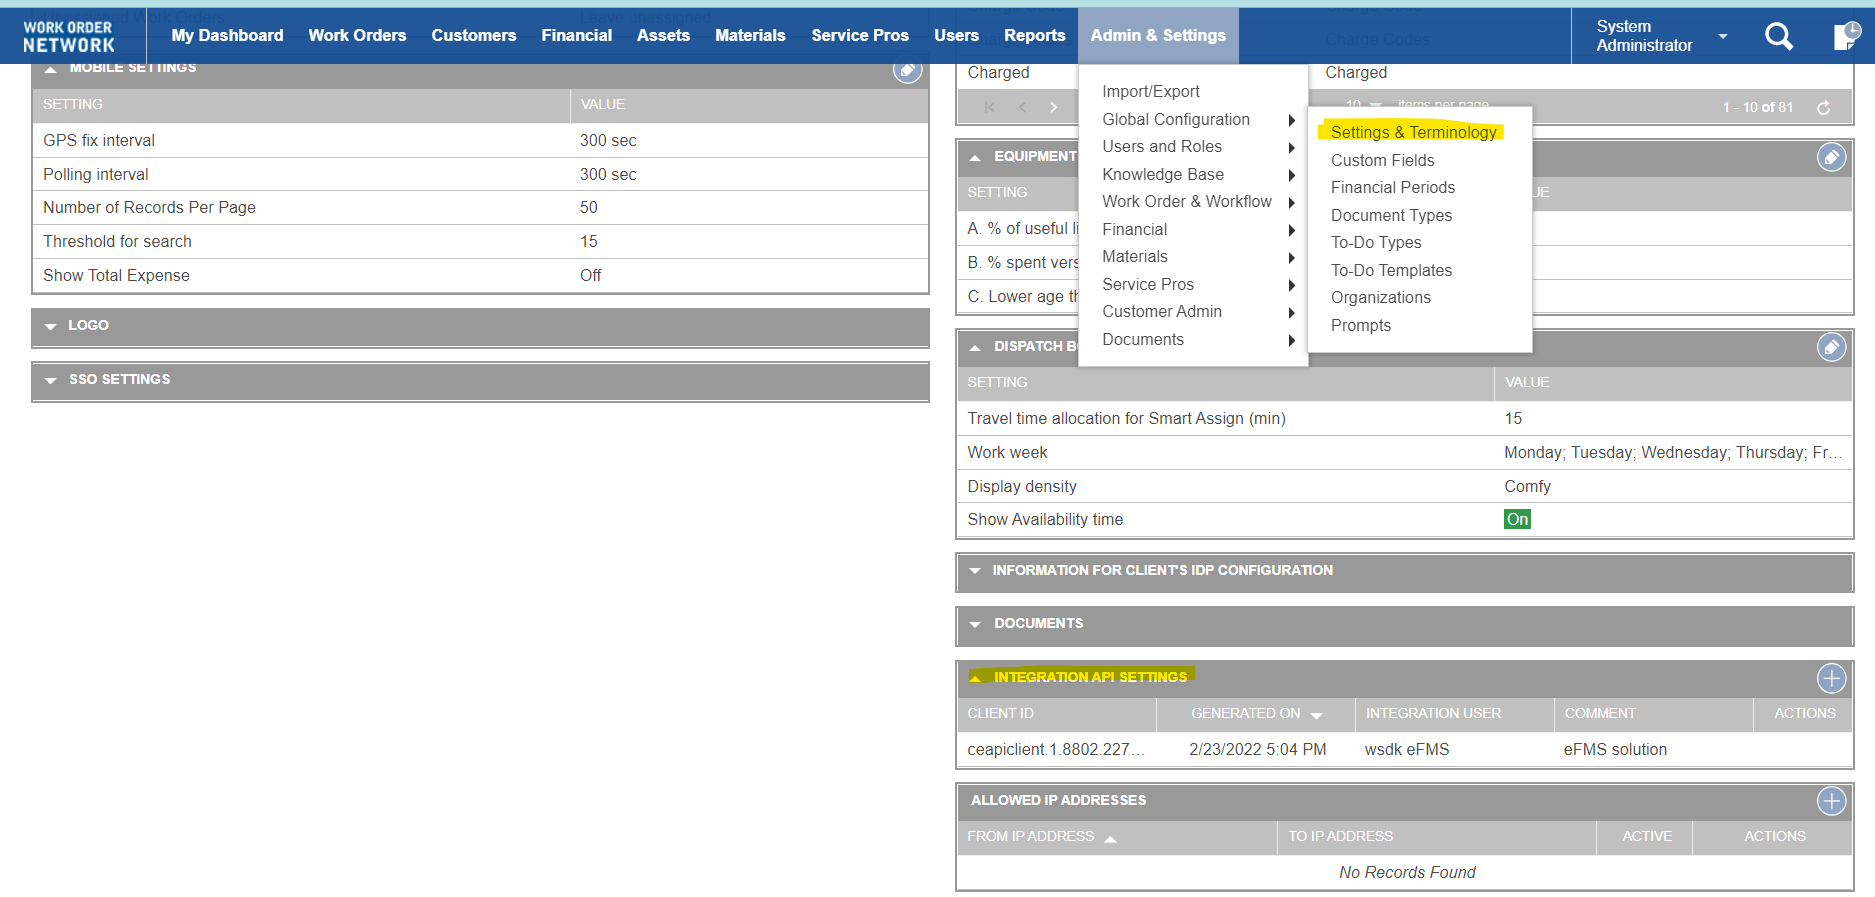
Navigate to
- Admin & Settings > Global Configuration, Settings & Terminology - Integration API Settings

Integration API Settings
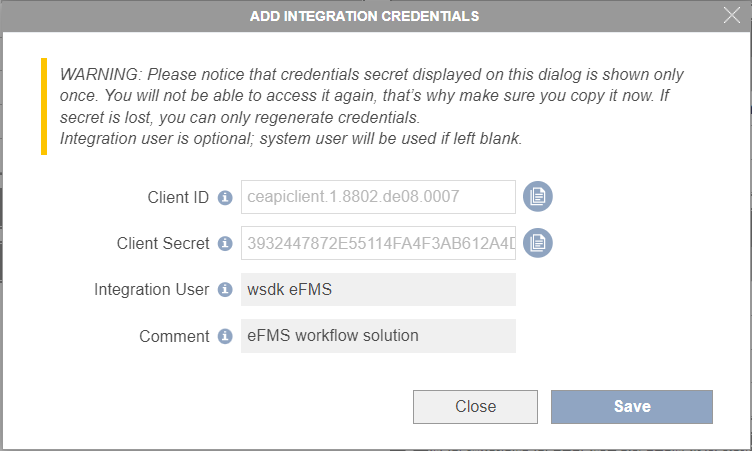
- Click ‘+’ button to open dialog. Copy and Paste values for Client ID and Client Secret so you can use them later with your OAuth token request.

Add Integration Credentials dialog
COPY CREDENTIALS BEFORE YOU CLOSE THE DIALOGTo enforce highest level of security, the dialog box that provides access to API credentials cannot be reopened. Make sure you copy the values to the clipboard and save in your Dev environment before you close the dialog.
Step 3 - Use API credentials to generate token
Send a POST request to https://oauth-pro-v2.corrigo.com/OAuth/token with the following body content:
- client_id: your client id from CE Global Settings
- client_secret: your client secret from CE Global Settings
- grant_type: constant value, set as "client_credentials"
- Content-type: application/x-www-form-urlencoded
Your sample cURL command may look like:
curl -i https://oauth-pro-v2.corrigo.com/OAuth/token -H "Content-Type: application/x-www-form-urlencoded" -d "grant_type=client_credentials&client_id={YOUR_CLIENT_ID}&client_secret={YOUR_CLIENT_SECRET}"